MAME64 controller mapping
MAME64 emulator is compatible natively with XInput controllers.
When using another type of controllers (or to simply use a specific mapping for a game), it is possible to perform a dedicated mapping within the emulator.
STEP 0 : Preliminary explanations
MAME standalone will read the controller configuration files in the following ordre of priority (from less priority to highest priority - meaning the last file found will override what is found before):
Native controller configuration
Default.cfg file located in
\bios\mame\cfgfolderGame specific config files located in
\bios\mame\cfgfolderController configuration file located in
\saves\mame\ctrlrfolder as per selection in RetroBat options
STEP 1 : Create controller mapping file in MAME
Run mame.exe, the executable is located in the emulators\mame folder of your RetroBat installation.
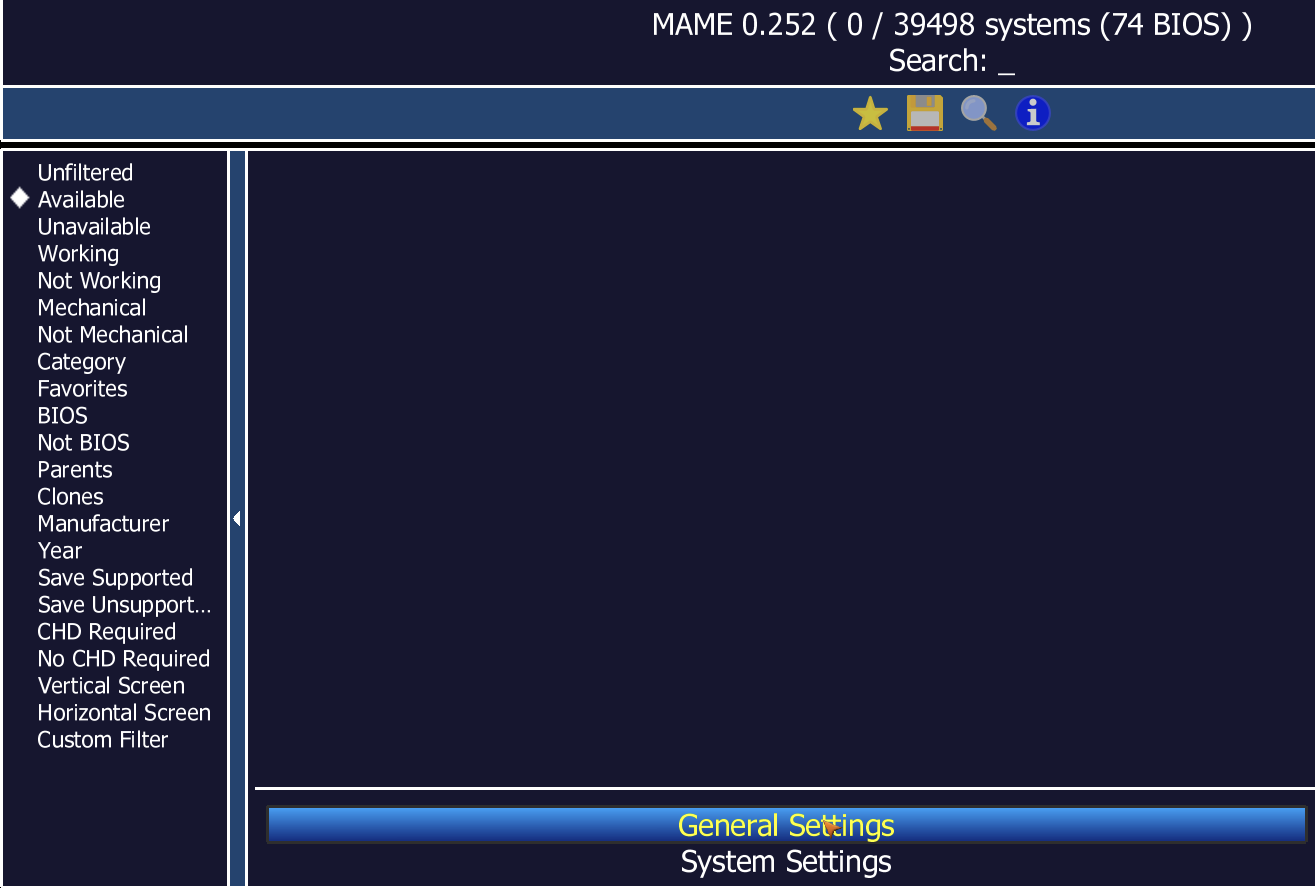
Click on "General Settings":
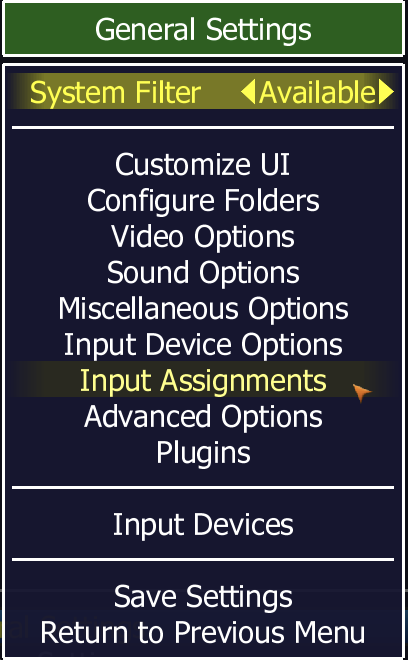
Select "Input Assignments"
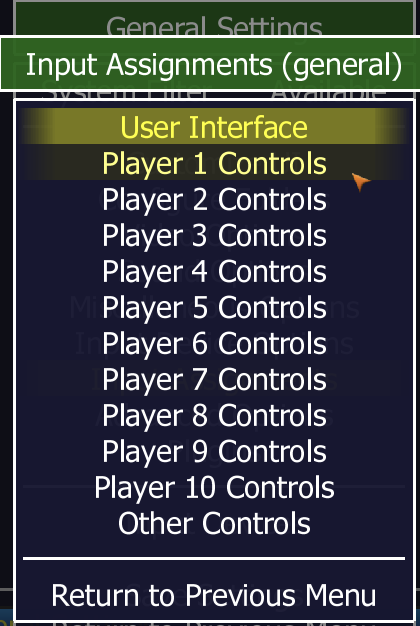
Select the controls you want to assign:
User Interface section lets you map buttons to actions in the MAME Menu
Player X Controls allows you to map in-game controls
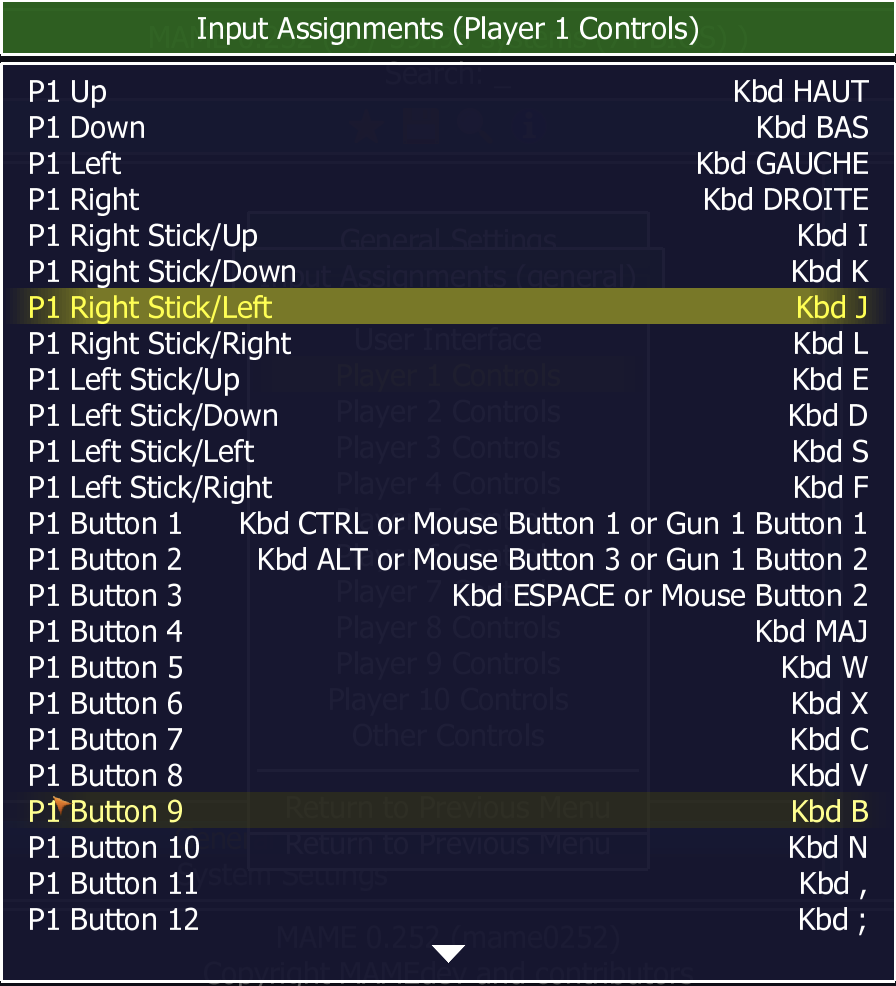
Map controls as you would like them:
When using left and right buttons (or keys), you can select whether to add a key to the same button or whether to reset the mapping for the control.


Once the mapping done, go back and click on "Save Settings":
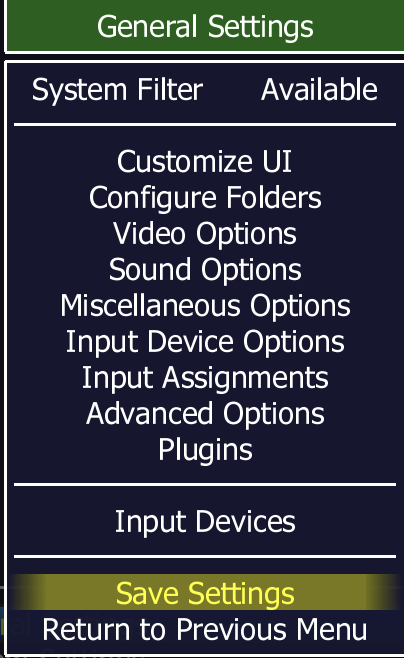
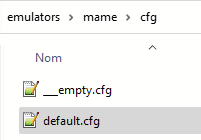
A file name "default.cfg" has been saved in the \emulators\mame\cfg folder.
STEP 2 : Manage the cfg file
Open the default.cfg file and check the content:
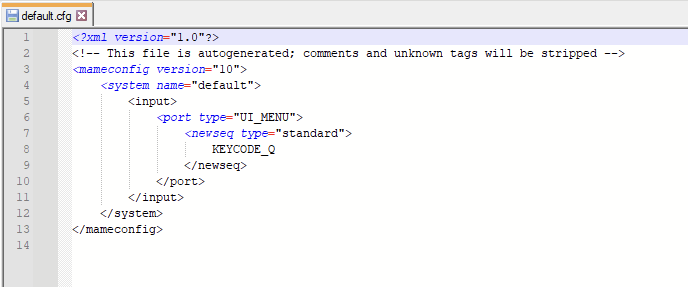
The file has an xml format, the mapping that you have performed is located in the <input> section of the file.
In the example, the keyboard key "Q" has been assigned to the action "UI_MENU" that opens the MAME menu.
Finally, copy the default.cfg file in the \bios\mame\cfg folder of your installation : this will now be the default controller configuration.
STEP 3 : Create a dedicated profile
Proceed as explained in step 1, then rename the file to one of the following values:
custom1.cfg
custom2.cfg
custom3.cfg
...
custom8.cfg
Move the file in the \saves\mame\ctrlr folder of your RetroBat installation:
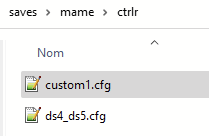
You can also perform the mapping directly in the cfg file if you feel comfortable with xml document processing.
Additional information on the file structure can be found here:
http://mirrors.arcadecontrols.com/easyemu/mameguidenew/mameguide-controlini.htm
STEP 4 : Select the controller profile in RetroBat
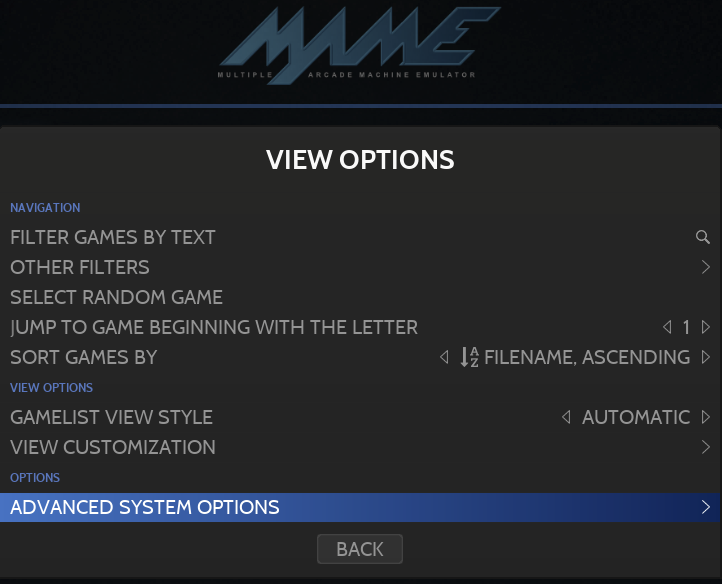
From the MAME Game view, press SELECT to open the View Options menu and select "ADVANCED SYSTEM OPTIONS"
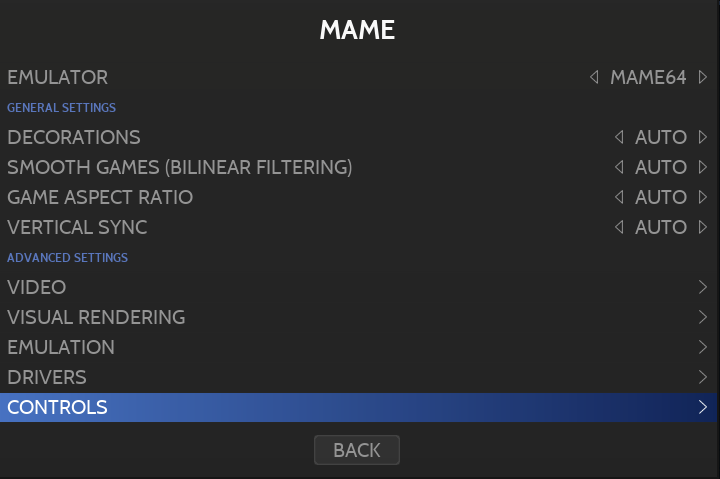
Ensure the MAME64 emulator is set as EMULATOR and navigate to the CONTROLS submenu:
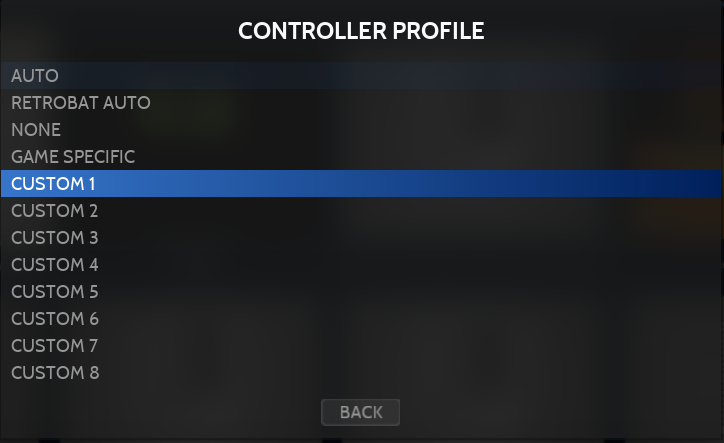
Select the "CONTROLLER PROFILE" option and choose the profile used for the file that you have created:
RetroBat provides 8 custom profiles as well as the ability to use a per_game cfg file.
When using "per_game", the name of the file must match the name of the game file (without extension), for example name the file "wjammers.cfg" for the game file "wjammers.zip" (WindJammers).
Do not hesitate to share the files you have created with the RetroBat team if you have a general profile that can be shared with other users.
Last updated
Was this helpful?
